Shop Now, Pay Later

FREE Shipping on All Orders $109 and Up!

Printing Instructions

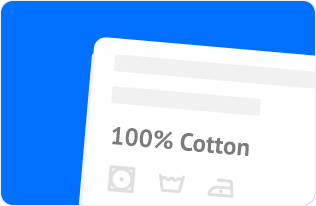
Each garment or fabric is manufactured with unique content. For example, some fabrics are basic 100% cotton, while others may be blended using cotton and polyester or several other yarns. We manufacture heat transfers for specific fabric types. Some of our transfers work on multiple fabric types and some may apply, but may not be suitable to wash on unintended fabrics.

We recommend you follow the supplied transfer application instructions for each formula:

Our Heat Transfers Color Formula
img

Recommended for:

Recommended Heat Press Machines:

img

White Paper Printing Instructions

1

Preheat Garment if necessary to
remove excess moisture

2

Set temperature on 375°F

3

Apply 60 Pounds of pressure.
Add pressure on manual press

4

Press for 5-7 seconds.
Peel immediately with confidence!

5

Do not use a teflon sheet or teflon
between heat platen and transfer
paper.

DTF Printing Instructions

1

Preheat Garment if necessary to
remove excess moisture

2

Set temperature on 300°F

3

Apply 60 Pounds of pressure.
Add pressure on manual press

4

Press for 15 seconds.Peel COLD!!!

5

Allow 2 minutes for the heat transfer to cool down, then peel cold.

Rhinestones Printing Instructions:

1

Preheat garment if necessary to remove excess moisture

2

Set machine temperature on 300°F

3

Apply 60 Pounds of pressure. Add extra pressure on manual press

4

Use a teflon between heat plate and transfer paper.

5

Press for 15 seconds.Peel COLD!!!

How to Use Patches Transfers

1

Preheat garment if necessary to remove excess moisture

2

Set machine temperature on 300°F

3

Apply 60 Pounds of pressure. Add extra pressure on manual press

4

Use a teflon between heat plate and transfer paper.

5

Press for 15 seconds.

How to Use Puff Transfers

1

Preheat garment if necessary to remove excess moisture

2

Set machine temperature on 350°F

3

Apply 60 Pounds of pressure. Add extra pressure on manual press

4

Use a teflon between heat plate and transfer paper.

5

Press for 7 seconds.Peel hot!!!

How to use UV-DTF stickers

1

Choose a dry surface (cup, mug, tumblr, etc)

2

Peel white backing from the sticker

3

Apply the UV-DTF onto the product

4

Rub sticker for 15 seconds

5

Peel away the glossy film

Washing Instructions:

Allow 24 - 48 hours to allow the garment to completely cure before machine wash

gr
  • 1
  • 2
  • 3

Tumble dry low heat

Wash inside out
in cold water

What should I do if my transfers aren’t Printing Properly?

First of all, if you have a problem printing any transfer, Stop! Do not continue printing the order until you know what is causing the issue.

We check every production job run for quality and verify there are no manufacturing defects before it leaves our factory. If for some reason a transfer order leaves our factory with a defect, we will replace it at no charge.

Typical reasons a transfer fails to apply properly are related to application error. We recommend you check the packing label and verify the product type listed is what you ordered. We clearly mark the product type on each package which includes the application instructions.

Many times an error is made when the customer thinks they ordered a particular formula type, but selected something else. Not all formulas apply with the same application instructions.

Basic requirements every transfer must use in order to apply properly:

1

Temperature

Verify your machine is set and is reaching the recommended temperature for the specific product type. Use a Pyrometer to verify your machine is reaching the temperature. We recommend you remove any teflon covers or sheets between the heating platen and your heat transfer before application

2

Time

The instructions show a range of typically between 7 - 10 seconds. This time is based on the upper platen making contact with the transfer and the fabric substrate. Time can be adjusted up and down based on the amount of pressure your machine can achieve

3

Pressure

It is important that your heat press machine is able to generate enough pressure to make the transfer bond properly to the shirt as well as release from the paper. You can have either too much pressure or too little pressure

We’re available if you need help! We ask that you photograph the issue you're having and provide the order number. This helps us reference exactly which product you ordered and when the order was placed. You can email us at support@stocktransfers.org On your subject line please indicate your order number and the words **Urgent Transfer Issue**

Transfer Problem Possible Reason Solution
Heat Transfer will not Release completely from the Paper Not enough pressure Verify your pressure settings. Begin by uncreasing the pressure. Keep increasing pressure intil you see improvement
Not enough heat You can increase your temperature by 10 degrees. Note: Be carefule not to add to much heat. Verify your heat using a pyrometer.
Fabric Moisture Try Pre Pressing the garment for 10 seconds before you apply the transfer to remove moisture.
Too much Pressure Usually with Air / Pneumatic machines - reduce your pressure to the recommended settings.
Heat Transfer corners are not sticking Not enough pressure Increase your pressure to 60 PSI or Heavy Pressure settings
Not enough heat Verify your heat press temperature with Pyrometer
Transfer product not meant for Polyeser Use Varsity Formula for 100% Poluester Fabrics
Transfer in printed too hot Verify your heat press temperature settings
Transfer Cracks or peels off after washing Washing too soon after application Allow 48 hours before washing after application
Transfer applied less then 325°F Check and verify product application instructions

How to Wash your Heat Pressed Garments

Stock Transfers offers many heat transfer formulas which can be machine washed when properly applied with a commercial heat press machine.

Our transfers are printed with Plastisol inks which are screen printed on to a special release paper. It’s important to understand that when applying the transfer it is critical the application instructions are followed exactly.

Important factors include:

  • Dwell Time

    Hang Dry (preferred), or Tumble Dry Low Heat

    Once you apply your transfer with the correct time, temperature and pressure, we recommend you Do Not Wash your garment for at least 24 - 48 hours. This allows the ink to completely bond and cure before any laundry detergents break down the ink.

  • Application Temperature

    Do not use Chlorine Bleach

    We recommend you machine wash your garment, inside out in cold water and hang to dry. If you absolutely insist on using a dryer, tumble dry on very low temperatures for no more than 10 minutes, then hang-to-dry. Do not iron on any ink print! Drying a printed shirt for too long, or using moisture control sensors, or keeping dryer temperatures too high will cause the ink to breakdown. This has nothing to do with the printing process, but everything to do with how the temperature effects on cured ink!!

  • Machine Pressure

    Do not Iron over the decoration

    We recommend you machine wash your garment, inside out in cold water and hang to dry. If you absolutely insist on using a dryer, tumble dry on very low temperatures for no more than 10 minutes, then hang-to-dry. Do not iron on any ink print! Drying a printed shirt for too long, or using moisture control sensors, or keeping dryer temperatures too high will cause the ink to breakdown. This has nothing to do with the printing process, but everything to do with how the temperature effects on cured ink!!

  • Hang Dry (preferred), or Tumble Dry Low Heat
  • Do not use Chlorine Bleach
  • Do not Iron over the decoration
-->